Im a big fan of Linux: the embedded stuff, not the Ubuntu crap you spend 3 months configuring before you can use the interwebs and thats marginally better than Winblows for ease of use. Thus when OpenWRT released "Backfire" i.e version 10.03, I was pretty excited. I had used a few versions before this, from 7.0 onwards, and was pretty happy with the results. Except for one or two points. Version 8 wouldnt boot on my Belkin router due to some RDC processor related bug, and I couldnt get it to support MMC (SD cards) on my Fonera router. Having the additional memory on your router is useful for cracking networks, installing additional packages such as a file server, web server, etc. However, that last problem has been solved with the new release, which I will outline here.
 |
| Fonera 2100 Router |
 |
| Serial Pin-out for Fonera |
First off, you will need to install OpenWRT on your fonera router. There are countless guides for doing this on the net, so here is another. You will need to build a serial cable. The easiest way to do this is to go onto ebay and buy yourself a Nokia DKU-5 data cable. This cable was used back in the day of tear-aways to hook a nokia phone up to a PC. To this, it needs to shift the serial Tx and Rx lines of the pc (anything from 3v to 15v), to 3.3v ttl for the phone. Thankfully, this is levels that we need to communicate with the router. A modifying the cable for our use is available
here. You will just need 3 wires: Gnd, Tx, and Rx. Connect them up to the fonera as shown
here. Fire up your terminal program (hyperterminal on the PC, ZTerm on the mac, or minicom or putty on Ubuntu) with the settings: 9600 baud, 8N1, no flow control. When you power cycle the fonera, you should be greeted with a load of text output from the fonera starting up. If not, try swapping the Tx and Rx lines. I have also experienced some problems with the fonera not booting up properly when there is a serial cable connected up: try leaving the serial cable disconnected for a second or two after you power cycle, and then connect it up again.
Once you have serial working, use the OpenWrt flashing guide available here:
http://wiki.openwrt.org/toh/fon/fonera (scroll down to near the end). Note, for the "fis create" step, I had to use:
fis create -l 0x006D0000 rootfs
...due to the size left for the Backfire filesystem.
 |
| Larsens MMC Hardware setup (given in link) |
Now, you have OpenWrt installed on your router. You will need to wire up a MMC card to the general input/output pins (GPIO) on the router. A guide is available
here. Just follow the harware steps: I left the resistors, I just removed the capacitors
When you have that done, go to the web interface at 192.168.1.1, and enable wireless. Select client mode, save and apply settings, then scan for wireless networks, and connect to your local wireless internet. Then go to network-interfaces-wan and add "wifi0" as your wan connection, and DHCP as your protocol. If you reboot the router, it should connect to your local wireless network. Go back to your terminal, and see if you have successfully connected the device to the internet by pinging google:
ping www.google.com
You should get a response. Now, go to the software tab under administration, and click on
update packages. Then install the
luci-app-mmc-over-gpio package. This should install all the required dependencies. Reboot the router (type "reboot" in the terminal window or power cycle) and go to the newly available "MMC" tab under administration. Click on "enable", leave the other values alone, save and reboot the router again. In your terminal, OpenWRT should boot normally. Leave it for an additional minute or two. At the end, you should see something like:
gpio-mmc: Failed to request mmc_spi module.
mmc_spi spi32766.0: ASSUMING 3.2-3.4 V slot power
mmc_spi spi32766.0: SD/MMC host mmc0, no DMA, no WP, no poweroff
gpio-mmc: MMC-Card "default" attached to GPIO pins di=1, do=3, clk=4, cs=7
mmc_spi spi32766.0: can't change chip-select polarity
mmc0: host does not support reading read-only switch. assuming write-enable.
mmc0: new SD card on SPI
mmcblk0: mmc0:0000 SU128 120 MiB
 mmcblk0: p1
If you go to the /dev folder, you should see a new mmcblk0 and a mmcblk0p1. The latter is the first partition found on the MMC card (assuming that you formatted the card correctly: i stuck it in a windows machine and formatted it fat32). From the guide available
here, you will need to install the some packages in the terminal:
opkg update
opkg install kmod-fs-vfat kmod-nls-cp437 kmod-nls-cp850 kmod-nls-iso8859-15
Now, create a folder to mount the MMC card in your /mnt folder:
mkdir /mnt/mmc
Now, mount the MMC card and hopefully you will get no errors:
mount /dev/mmcblk0p1 /mnt/mmc
Congrats! You now have plenty of additional (albeit a bit slow) external storage (I did get an unknown char error when i first tried to mount, but after I installed kmod-nls-iso8859-1 I think it was, it worked fine). This extra space will be handy for running Aircrack-ng to hack wireless networks and for other uses.
Handy post:
https://forum.openwrt.org/viewtopic.php?id=21590&p=1
 I received an IPhone the other day that would not charge. My first thought was that the logic board was fried from a dodgy charger, since I had come across a similar problem before.
  Two things could cause this. A dodgy battery that cannot hold a charge (unlikely, as that would be a very gradual problem: this iphone suddenly couldnt hold a charge) or two, the white wire that monitors the temperature of the battery to help it charge was broken, making the IPhone refuse to charge the battery. Sure enough, after opening it up, this was the problem. The white wire bad broken off the Comms board. I didnt have my trustly weller soldering iron with me at the time, so I set about soldering the wire back on with a cheap 10 dollar fire-starter iron. Of coarse, I got solder all over the pad and the shielding on the comms board. So, as I was feeling quite lazy, i tried to remove the excess solder from the shielding with a small wire snips.
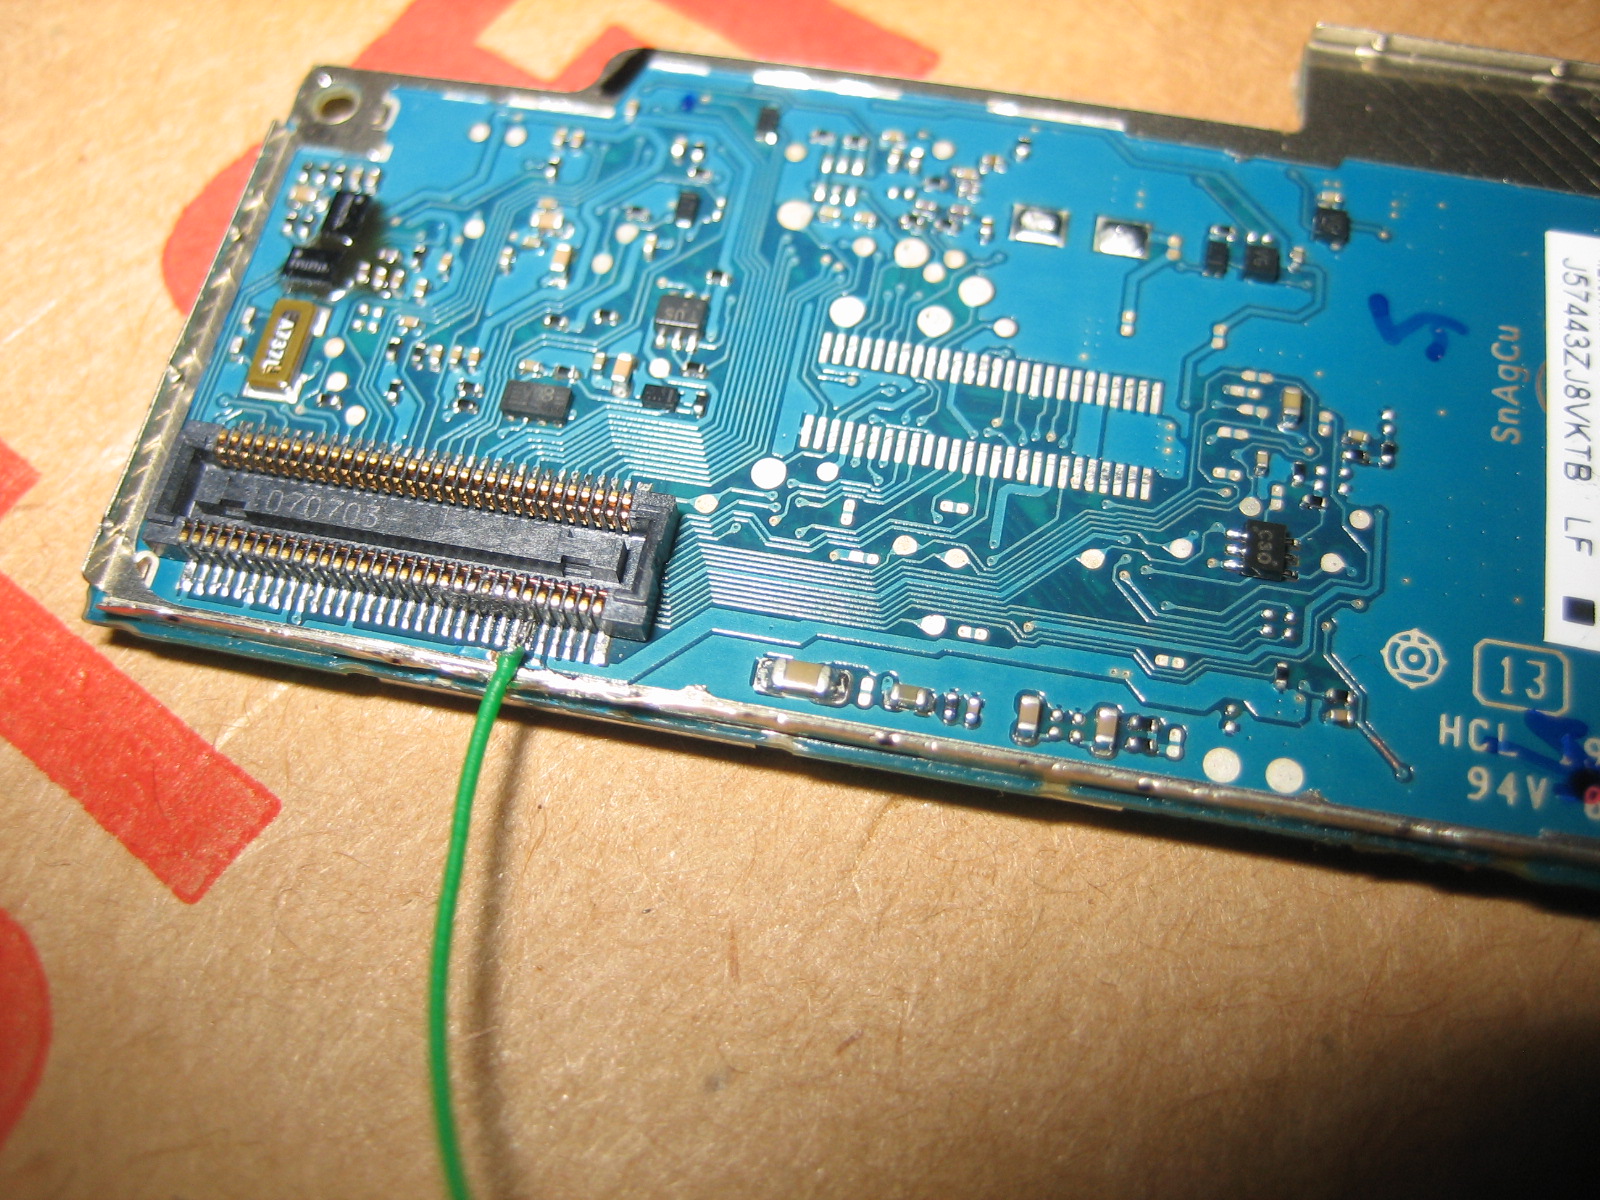


